Create multiple BlueSky handles for your domain
January 5, 2025
BlueSky, a decentralized social media platform built on the AT Protocol, allows users to create custom handles for their teams or companies. The AT Protocol is a next-generation networking protocol that powers BlueSky, enabling decentralized, portable, and verifiable identities.
Setting up custom handles enhances brand identity and makes it easier for others to verify accounts within your team. Here’s a step-by-step guide to set up custom handles by adding the required DNS records.
Table of Contents
What Is the AT Protocol?
The Authenticated Transfer (AT) Protocol is an open, decentralized social networking protocol developed by BlueSky. It offers several key features:
- Decentralization: Users have control over their data and can interact across different servers seamlessly.
- Portability: Users can transfer their accounts and data between platforms without losing their identity or content.
- Interoperability: The AT Protocol supports open standards, allowing apps to work together without proprietary restrictions.
- Verification: Handles on BlueSky use Decentralized Identifiers (DIDs) stored in DNS records, enabling verifiable identities.
For more details about the AT Protocol, visit the official documentation.
Prerequisites
- Access to your DNS management system.
- Access to the BlueSky accounts (e.g., owner account and member accounts) to retrieve their respective DIDs.
- The Decentralized Identifier (DID) strings provided by BlueSky for each handle.
Instructions
To create custom handles, you need to add TXT records to your DNS settings. Follow these steps:
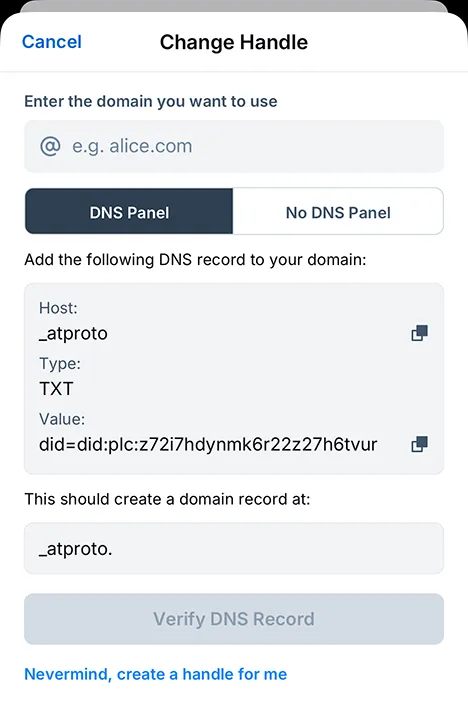
Step 1: Retrieve the DIDs for Each Account
Log into the respective BlueSky accounts to find their Decentralized Identifiers (DID). Each DID
will look like this: did:plc:________________
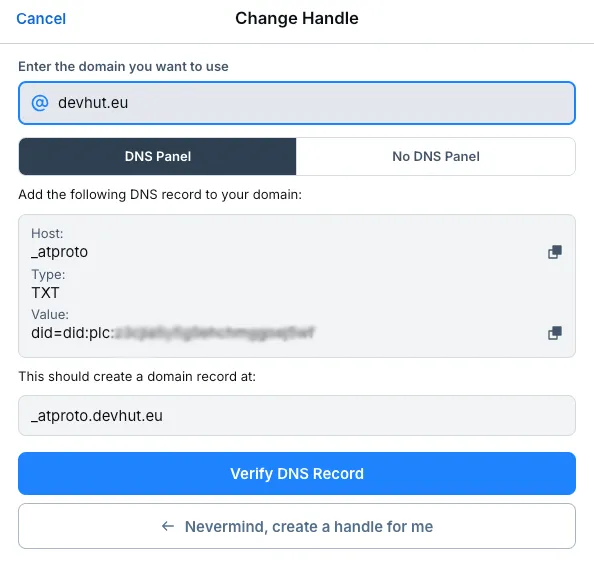
Main Account
In our example, our company’s domain is devhut.eu:
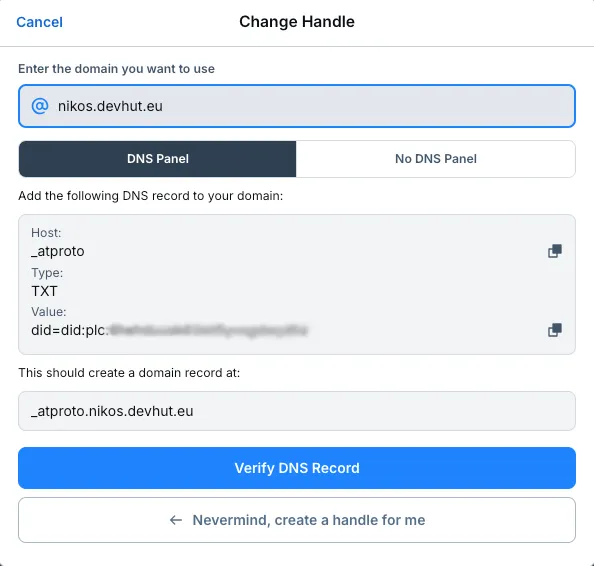
Member Account
Similarly, the member account will be nikos.devhut.eu:
Step 2: Log into Your DNS Management System
Navigate to the DNS settings of your domain provider (e.g., GoDaddy, Namecheap, Google Domains, Cloudflare, etc).
Keep in mind that if you’re using a hosting company other than the registrar, for example Cloudflare, you will have to navigate there to add your TXT record, instead of your original domain provider.

Step 3: Add the TXT Records
In your DNS management system, create two TXT records for each account. Use the following format:
Record 1: Main Handle
- Host:
_atproto - Type:
TXT - Value:
did=did:plc:________________
Replace the placeholder with the actual DID of the employee account.
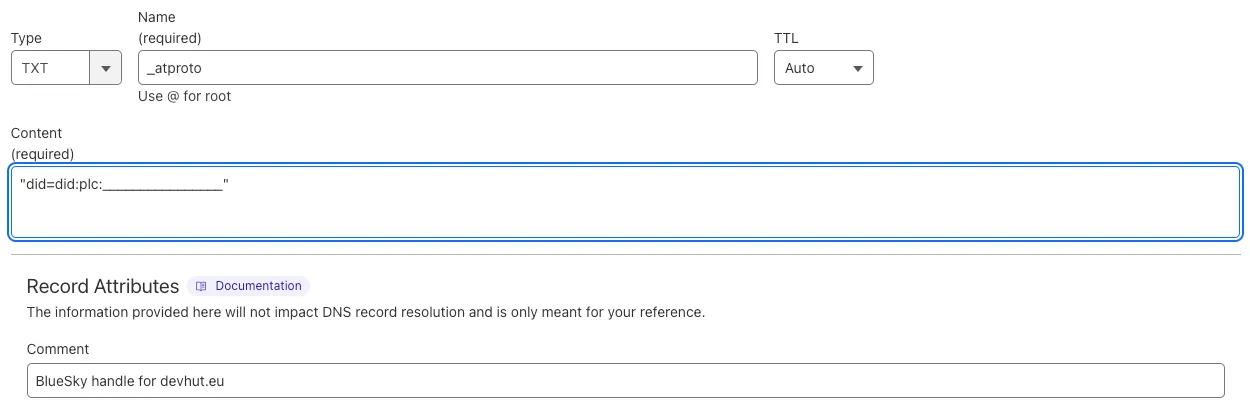
Record 2: Member Handle
- Host:
_atproto.member
Replacememberwith the desired subdomain for the member custom handle. - Type:
TXT - Value:
did=did:plc:________________
Replace the placeholder with the actual DID of the owner account.
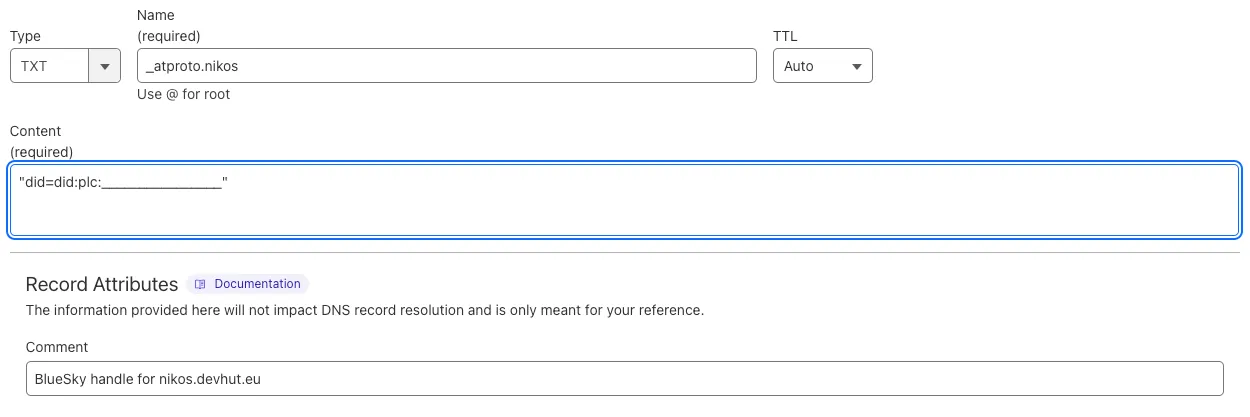
Step 4: Verify the Handles
Once the DNS records are updated, the custom handles should be linked to the respective BlueSky accounts.
- Example:
If your domain isexample.com, and the subdomain ismember, the main handle will be:@example.comand the member’s handle might be:@member.example.com
Step 5: Test the Setup
Allow some time for DNS changes to propagate (this might take a few minutes to 48 hours, depending on your DNS provider). Then, log into BlueSky to verify the new custom handles.
 |  |
|---|
Tips
- Double-check the DIDs before entering them into the DNS records to avoid mismatches.
- Use a consistent naming scheme for subdomains to maintain clarity across employee handles.
- Wait for DNS Refresh: DNS changes might take some time to propagate. Wait at least 5-10 minutes before testing, and in some cases, it might take up to 48 hours for full propagation.
- Fix “Invalid Handle” Issue:
If your handle says “Invalid handle” on your profile, reverify it by navigating to:
Settings > Change my handle > Type in your current handle > Verify DNS Record > Update.
(Essentially, update the handle to the same value.)
Alternatively, try editing your profile and saving with the same values to force it to refresh. - If you encounter any issues, consult BlueSky’s support or your DNS provider for troubleshooting.
Additional Resources
- AT Protocol Documentation
Explore the technical details of the AT Protocol, its goals, and implementation. - BlueSky Official Website
Learn more about BlueSky and how it leverages decentralized technologies. - What Are Decentralized Identifiers (DIDs)?
Understand the standard for DIDs and how they are used to create verifiable, decentralized identities.